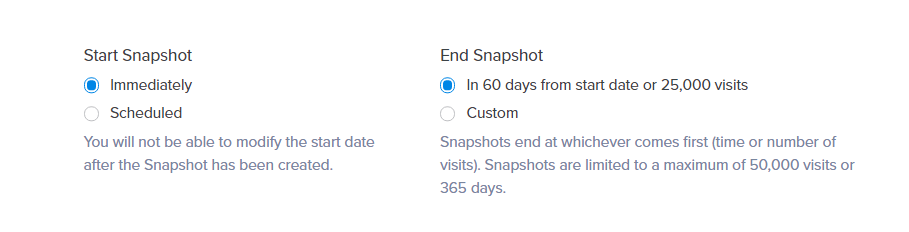
Heatmaps will not track forever. Newly created Heatmaps will automatically stop when either of the two conditions is met. Either the visit limit or the end date/time is reached, whichever comes first. The duration of a Heatmap is measured in both time and total number of visits. The default is 60 days from the Snapshot’s creation date or 25,000 page views.
Start Date of a Heatmap
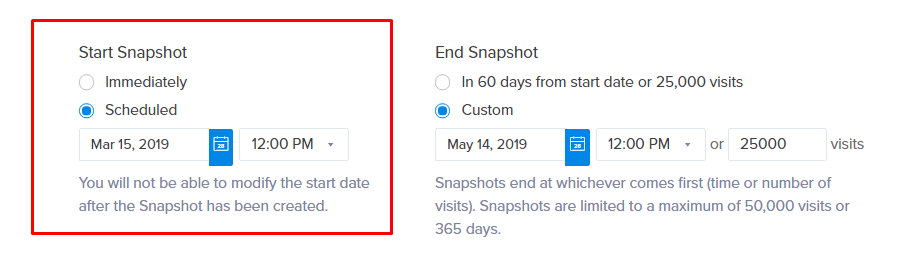
Changing the start time under Duration will schedule the snapshot to start at a later date and time of your choosing. The date and time entered will be based on your computer’s local time zone.
The Heatmap will appear on the dashboard as scheduled until the scheduled start date. The Snapshot screenshot will be captured on the scheduled date and time.
The only exception to this is if the Heatmap is created using Page Camera. The starting date and time cannot be changed once a Heatmap is created. Another point to note is that if the wrong start date and time are set, the Heatmap will need to be recreated.
End Date of a Heatmap
If you would like to specify a longer or shorter duration, this is where you can set the exact time the Heatmap will end. The Heatmap will end on the specified date and time, or when the visitor limit is reached, whichever comes first. The longest period a Heatmap can run is 365 days. If you do not edit the end date and time, your Heatmap will be based on the default settings: 60 days from the start date or 25,000 visits.

Considerations – An Example
Knowing how to control the duration of your Heatmap is important. The rationale is that it can influence your overall results and/or those of other Heatmaps. For example, if a Heatmap consumes a large share of your visits for the month, it can leave fewer visits for other Heatmaps. To edit the duration options, look at the Duration section when creating or editing a Heatmap.
Let’s take a look at an example of when setting a duration outside of the defaults might be helpful.
Say we are running a sale on our site starting in a few weeks. We’d like to set up a Heatmap to automatically start when the sale begins and end when the sale is over.
We’ll start by setting up a Heatmap as usual. When we reach the duration tab, we can click edit under Start Heatmap. Next, we will set a specific date & time for the Heatmap to start, based on when our sale will start.
Since the sale will last two weeks, we will also need to set an end date. To set an end date, click Edit under End Heatmap and select the desired end date and time.
With the changes to the duration in place, our Heatmap will now start and stop in line with our sales.