Create a Heatmap to learn about those fine details of what is happening on an individual page. By default, a Heatmap tracks every visit and visitors’ clicks and scrolls on your page. The click Heatmap report, Scrollmap report, and our five other reports all come from creating heatmaps.
Here is a recommended process to help you create a single Heatmap.
Click on + Create New Heatmap.
Click Heatmap for a single-page view.
Enter the URL of the webpage you want to track. The Heatmap Name will be automatically filled in.
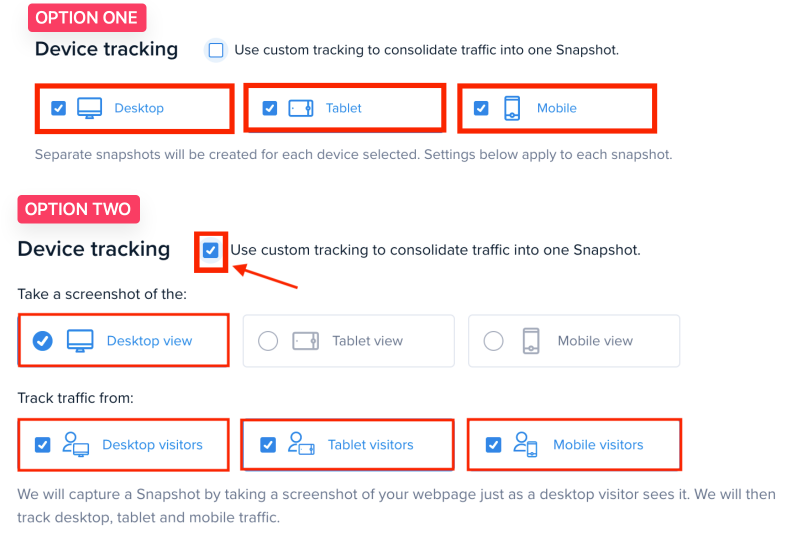
There are two options for device tracking. Option 1– Device Tracking is set by default and will create 3 separate Heatmaps for each device type: Desktop, Tablet, and Mobile. Option 2 – Tick the Custom Tracking box if your mobile visitor volume is less than 25% of your overall site or page traffic.
By default, the Start and End Duration settings are set for you. A Heatmap will start tracking immediately. A Heatmap will stop tracking after 60 days OR after 25,000 visits.
At this point, you can click on the Review button in the bottom right-hand corner. By default, we track every page visit and do not block pop-ups.
The thumbnail images will start to load. You can wait until you see them, or click the Create # Heatmaps button in the bottom-right corner.
Congratulations! You have created your Heatmaps. Now click on Return to Dashboard.