Folders are a great way to organize your Snapshots, A/B tests, and Edits. Folders allow you to group content by that domain (site) and then another group within that domain (site).
The steps outlined below are the same for Snapshots, A/B tests, and Edits. You would need to set folders up under each feature dashboard separately.
ORGANIZING YOUR DASHBOARD
Create a Folder - Step by Step
Here is a recommended process to help you get started.
In the example below, we'll look at creating a folder in the Snapshots dashboard. The process is the same for A/B tests and Edits. You will need to be on the appropriate feature dashboard.
- Step 1
- If you have multiple sites you are tracking under your account, select the domain you want to create folders on the top left-hand side (the purple site picker). Otherwise, the All Folders drop-down will remain gray.
- Step 2
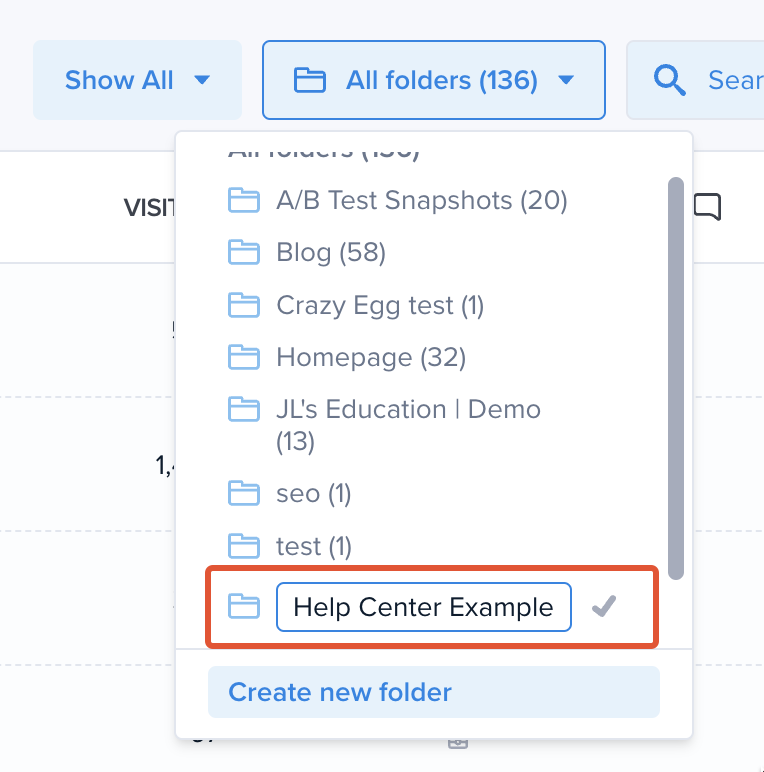
- Select a domain (site), click on the All Folders drop-down and choose to Create a New Folder.
- Step 3
- Name the folder and hit the enter or return key on your keyboard when you are done.
Editing the Name of the Folder - Step by Step
Here is a recommended process to help you get started.
In the example below, we'll look at how to edit the name of a folder under the Snapshots Dashboard. The process is the same for A/B tests and Edits. You will need to be on the appropriate feature dashboard.
- Step 1
- If you have multiple sites you are tracking under your account, select the domain you want to create folders on the top left-hand side (the purple site picker). Otherwise, the All Folders drop-down will remain gray.
- Step 2
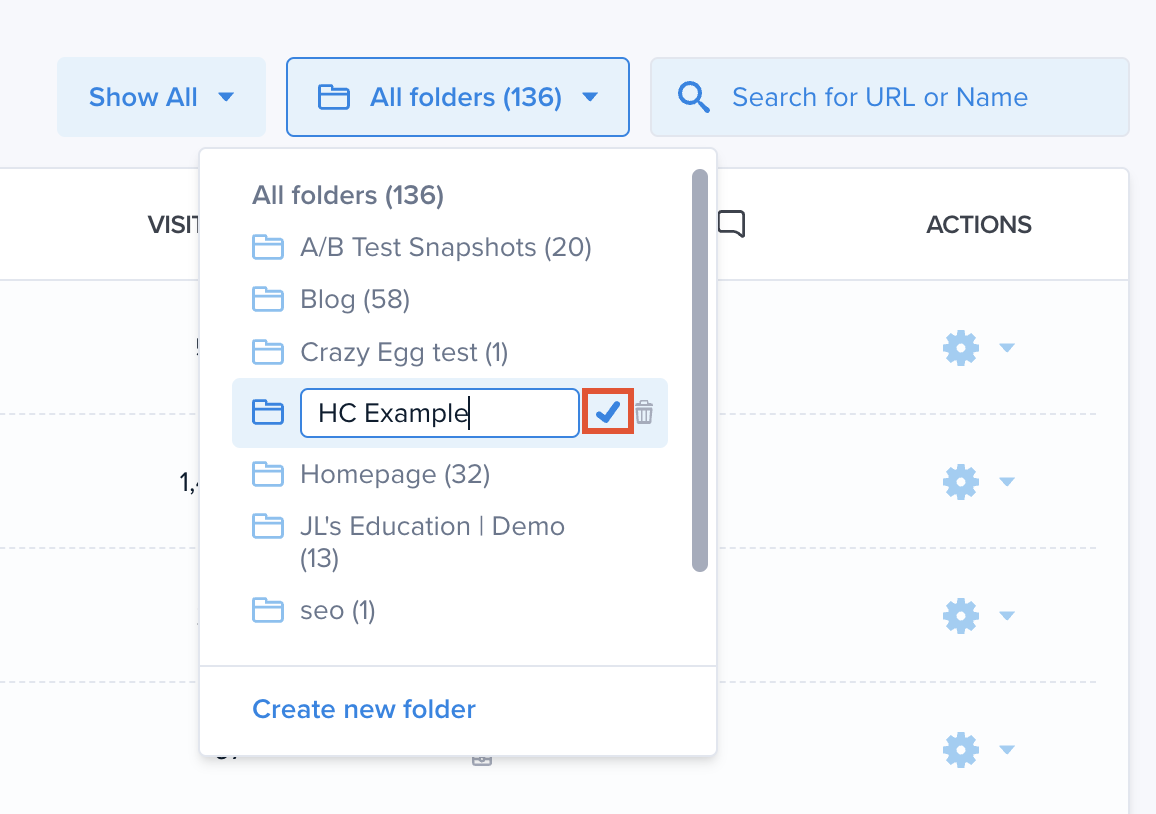
- Select a domain (site), click on the All Folders drop-down and click on the pencil icon for the folder you want to edit.
- Step 3
- Edit the folder and hit the enter key on your keyboard when you are done. Or click on the checkmark.
Deleting a Folder - Step by Step
Here is a recommended process to help you get started.
In the example below, we'll look at how to delete a folder under the Snapshots dashboard. The process is the same for A/B tests and Edits. You will need to be on the appropriate feature dashboard.
- Step 1
- If you have multiple sites you are tracking under your account, select the domain you want to create folders on the top left-hand side (the purple site picker). Otherwise, the All Folders drop-down will remain gray.
- Step 2
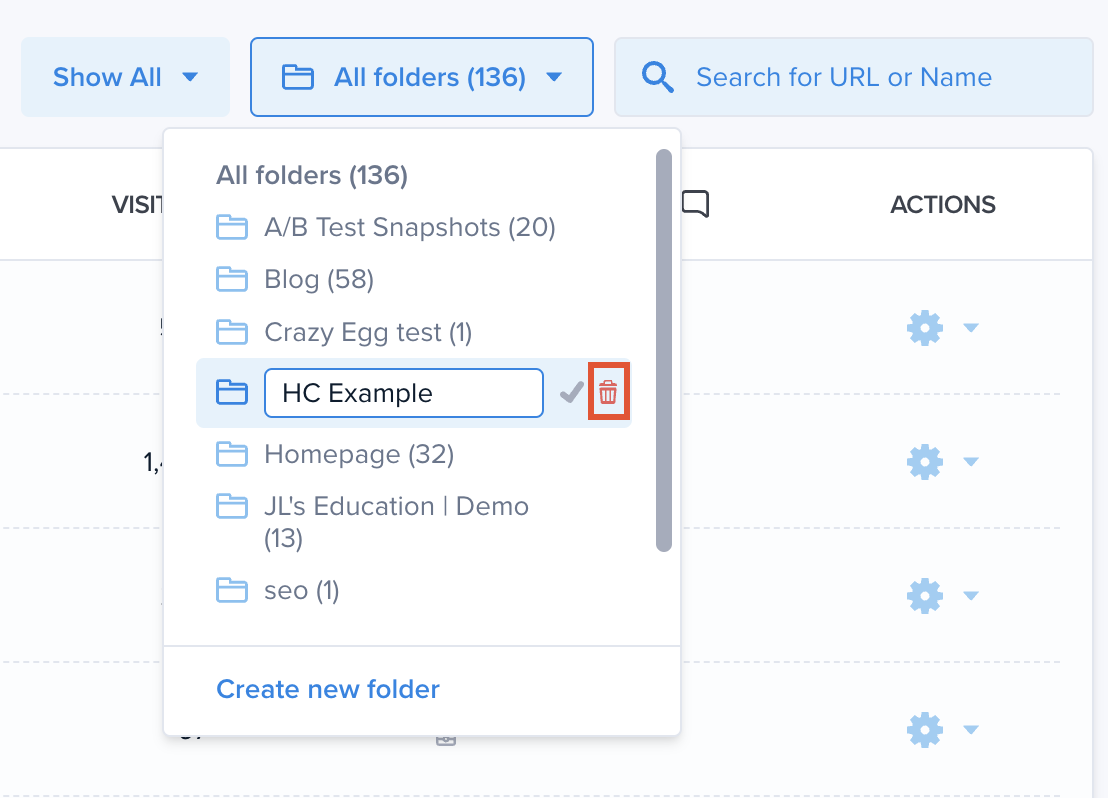
- Select a domain (site), click on the All Folders drop-down and click on the pencil icon for the folder you want to delete.
- Step 3
- Click on the trash can icon.
- Step 4
- A dialog box will open to confirm that you want to delete the folder if you have items in the folder. Otherwise, if the folder is empty, the system will simply delete it.
Moving Items Into the Folder - Step by Step
Here is a recommended process to help you get started.
In the example below, we'll look at how to organize Snapshots into two different Folders. The process is the same for A/B tests and Edits. You will need to be on the appropriate feature dashboard.
- Step 1
- If you have multiple sites you are tracking under your account, select the domain you want to create folders on the top left-hand side (the purple site picker).
- Step 2
- Select the Snapshots you would like to move by placing a checkmark in the box to the left of the Snapshot name. Or in the checkbox to the left of the column titled Snapshot.
- Step 3
- Click on folder icon at the bottom of the screen in the new menu and select the folder.