Pages behind a login require visitors to log in before they can access them. When creating a Heatmap, you need to use our Page Camera Chrome-based extension (install here).
This allows you to capture a screenshot of your web page while you are viewing the page in your browser. Page Camera works with Chromium-based browsers, such as Microsoft Edge, Brave, Opera, and Vivaldi. You will need the latest version of your favourite browser for this to work.
Please see this article if you are using Page Camera to create a Heatmap for a shopping cart page.
Using Page Camera – Step by Step
Here is a recommended process to help you get started.
Be sure you are logged into your Crazy Egg account before using Page Camera.
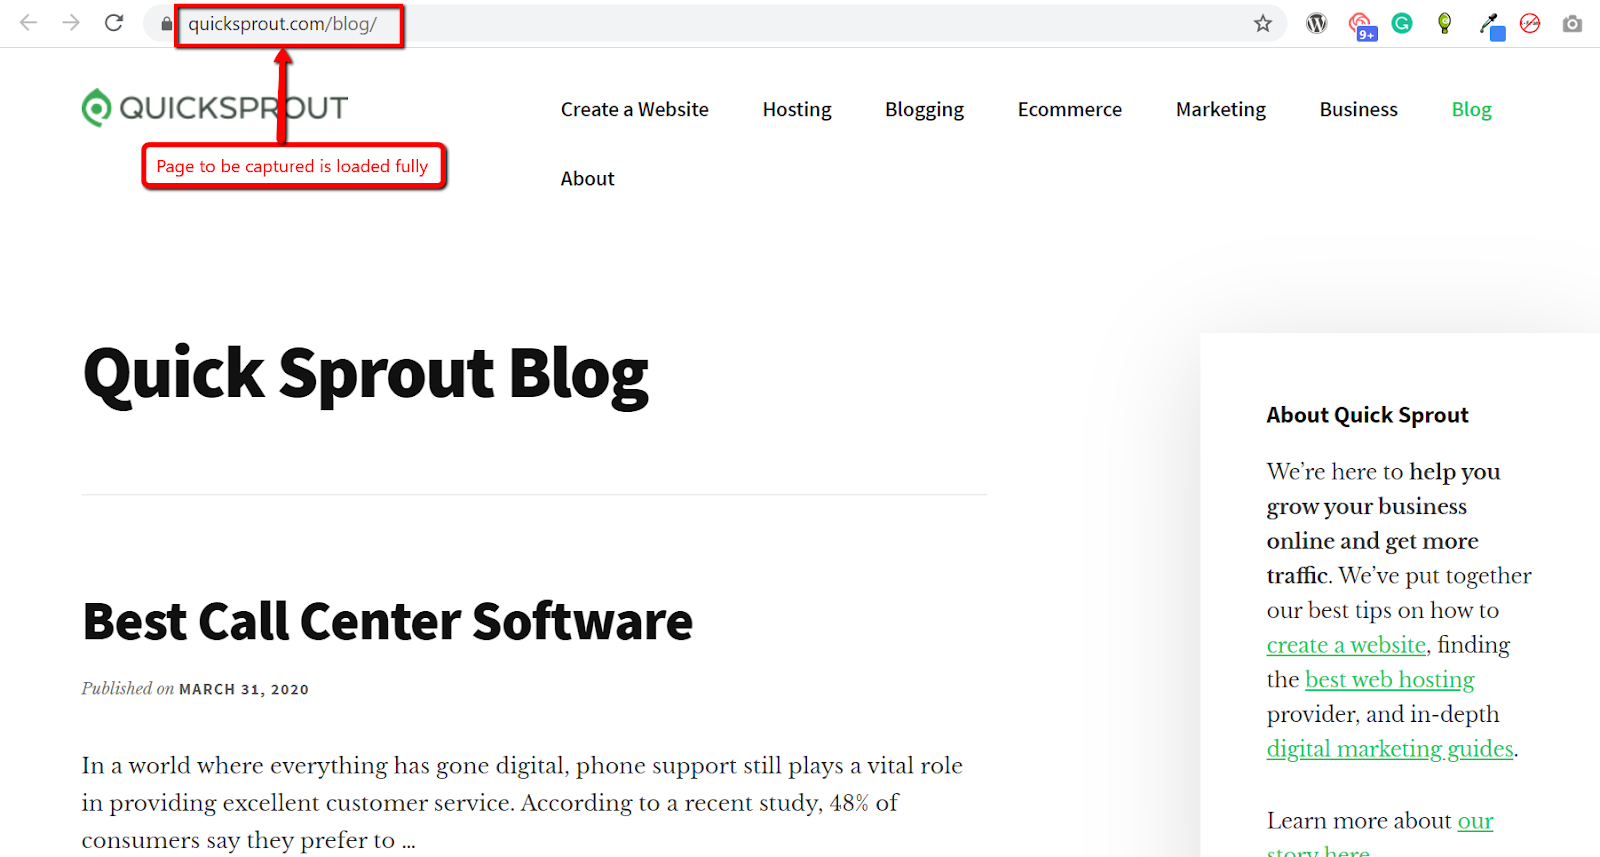
Navigate to the page you would like to track in any of the supported browsers. Take any necessary action to access the page; this might include logging in, adding an item to the cart, or scrolling to fully load the page.
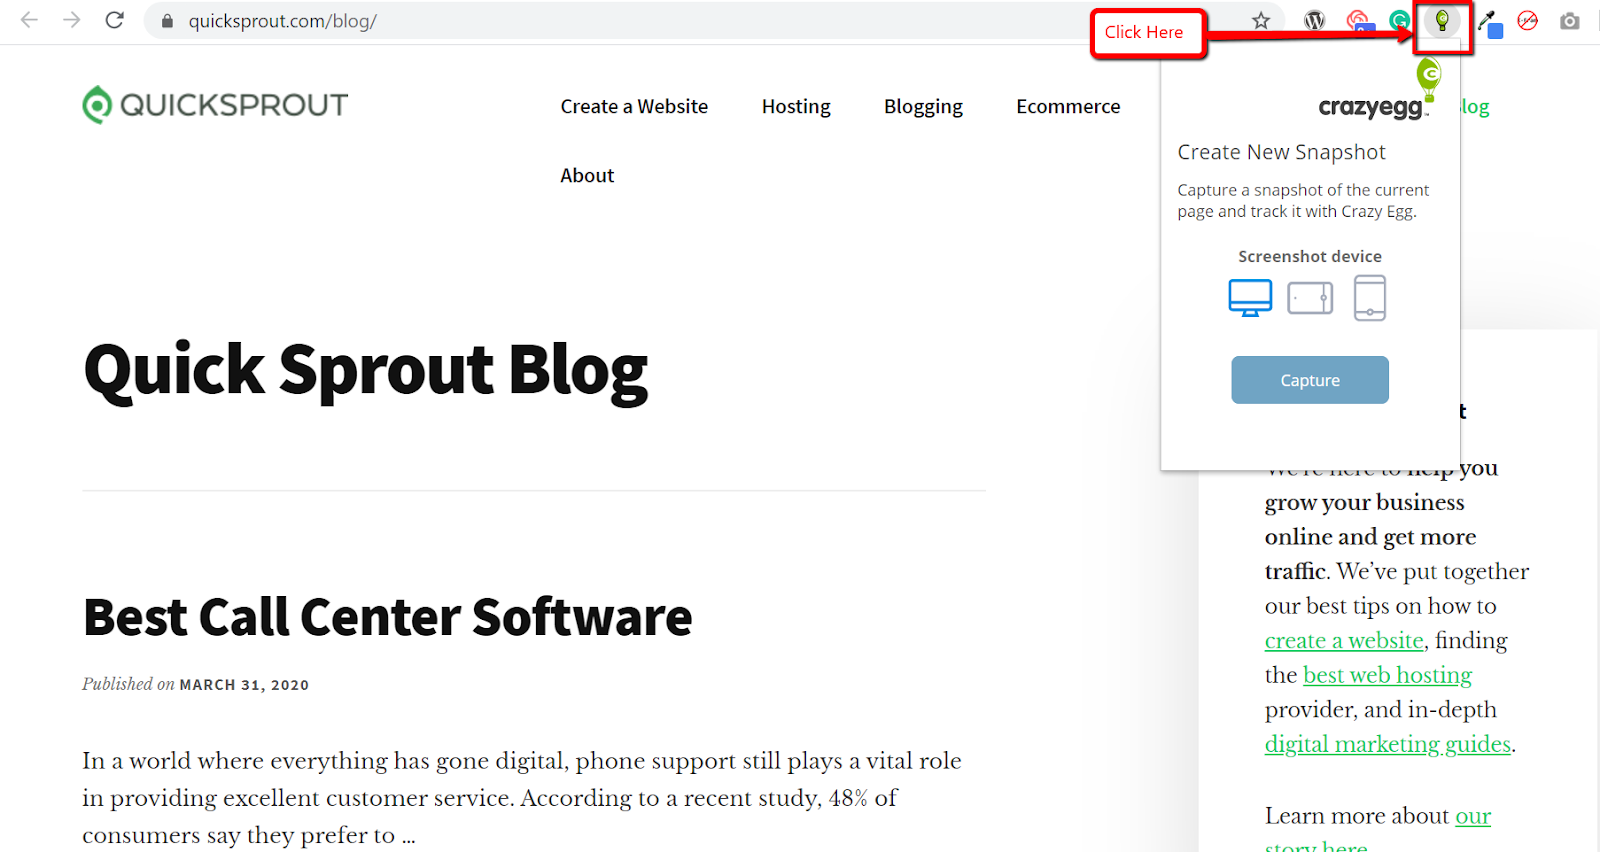
Once the page has fully loaded, click the Page Camera extension icon in the top-right corner of your browser.
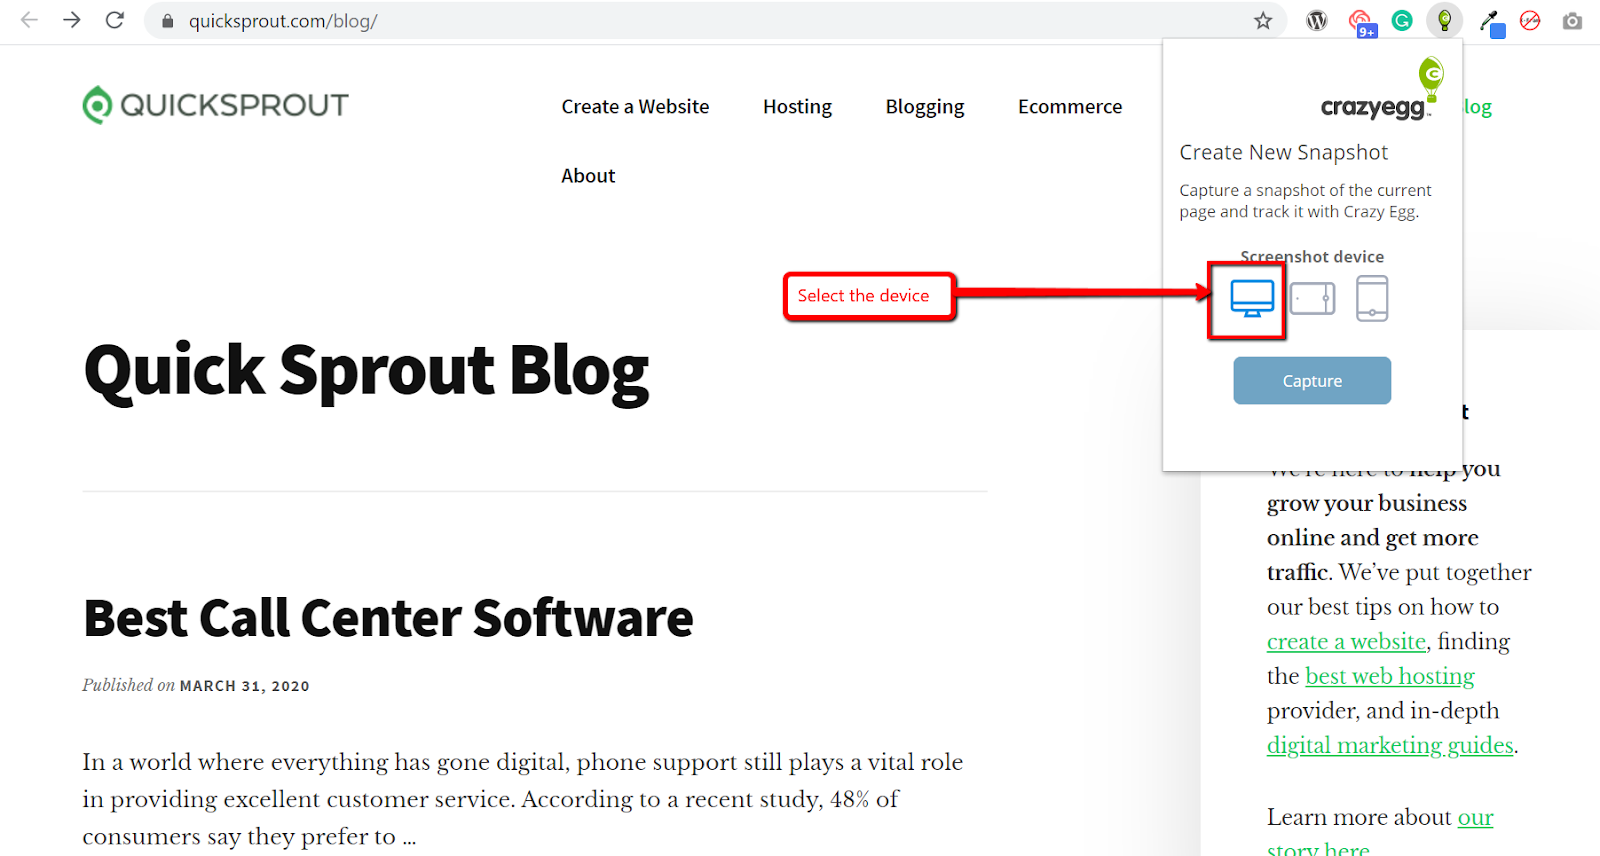
Select the type of device you want the image to be captured with. By default, Page Camera will capture the page from the perspective of a desktop visitor, but this can be changed to Tablet or Mobile.
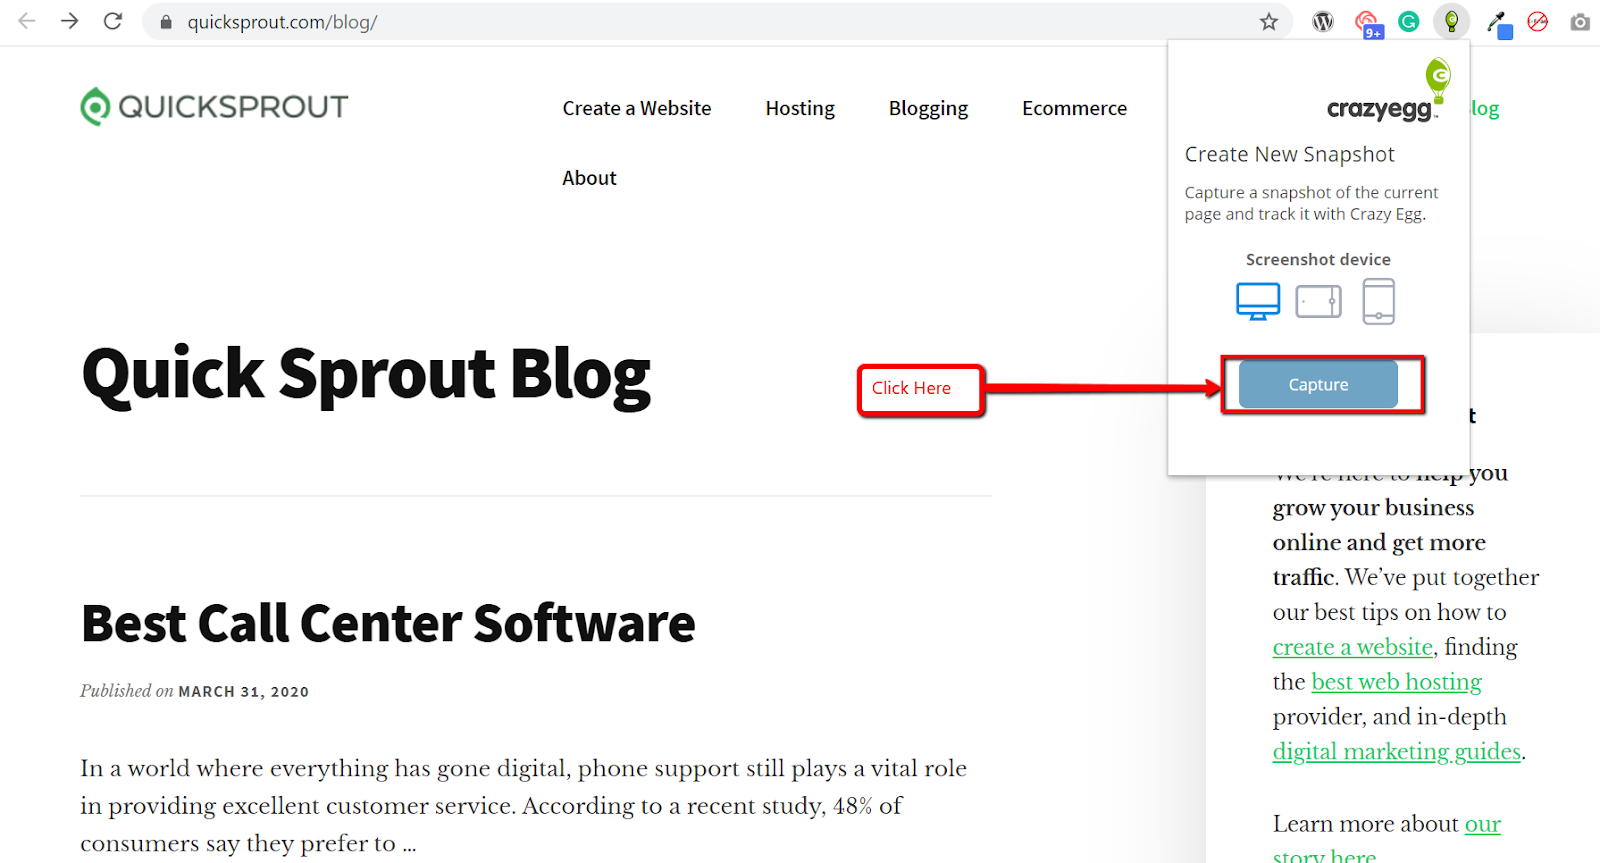
Clicking Capture starts the Page Camera, which scans your page to create a screenshot. Note: Do not navigate away from the page or change tabs while Page Camera is capturing the screenshot.
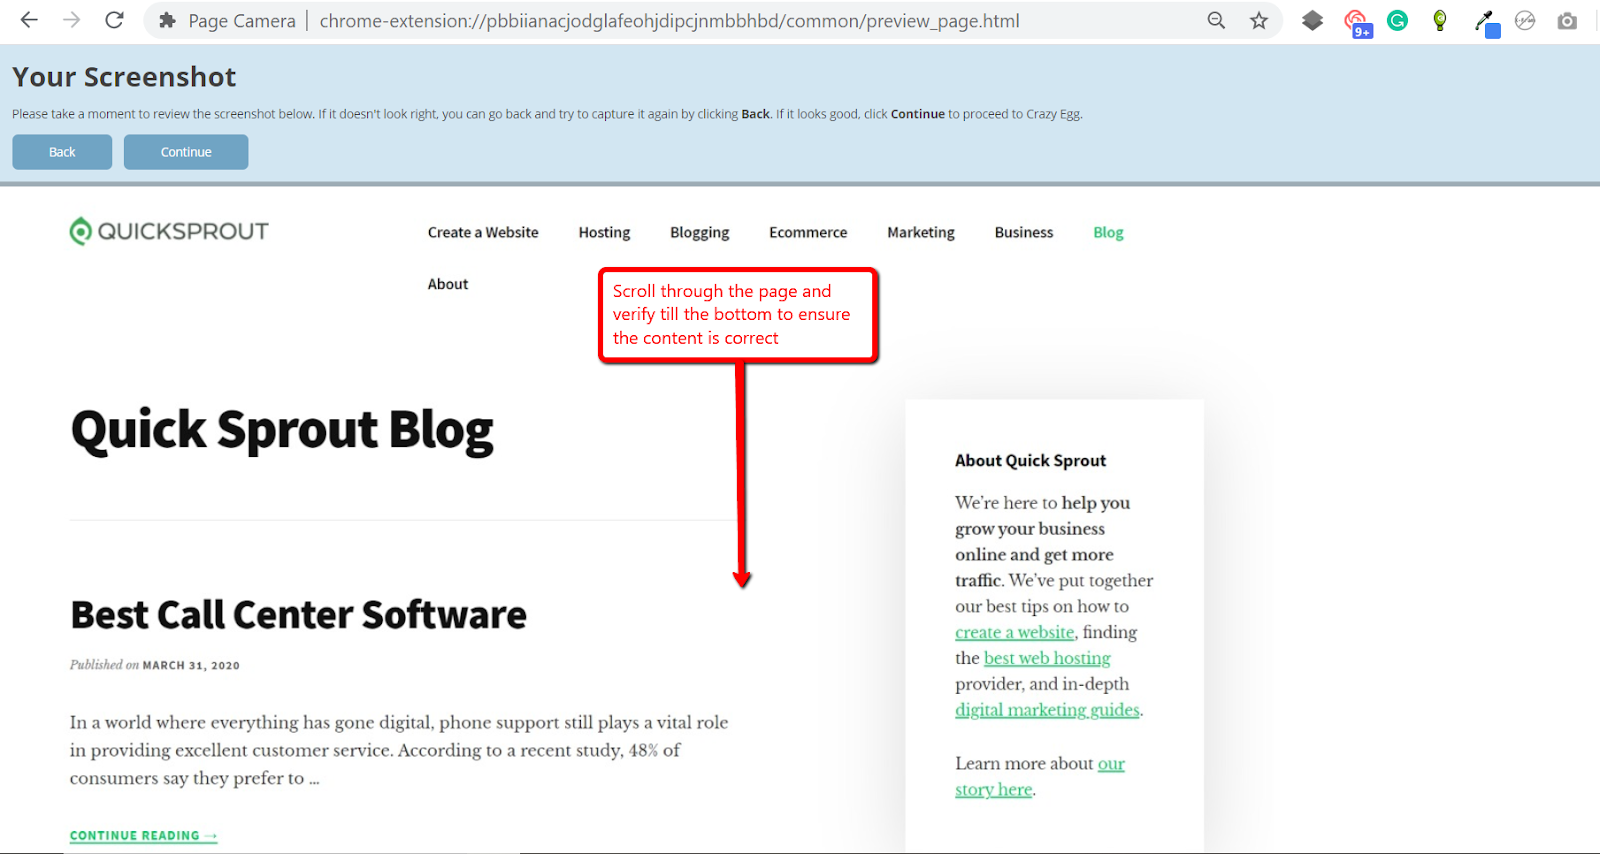
You will be asked to review the screenshot. At this point, scroll through the screenshot Page Camera has created to ensure all the content is as intended.
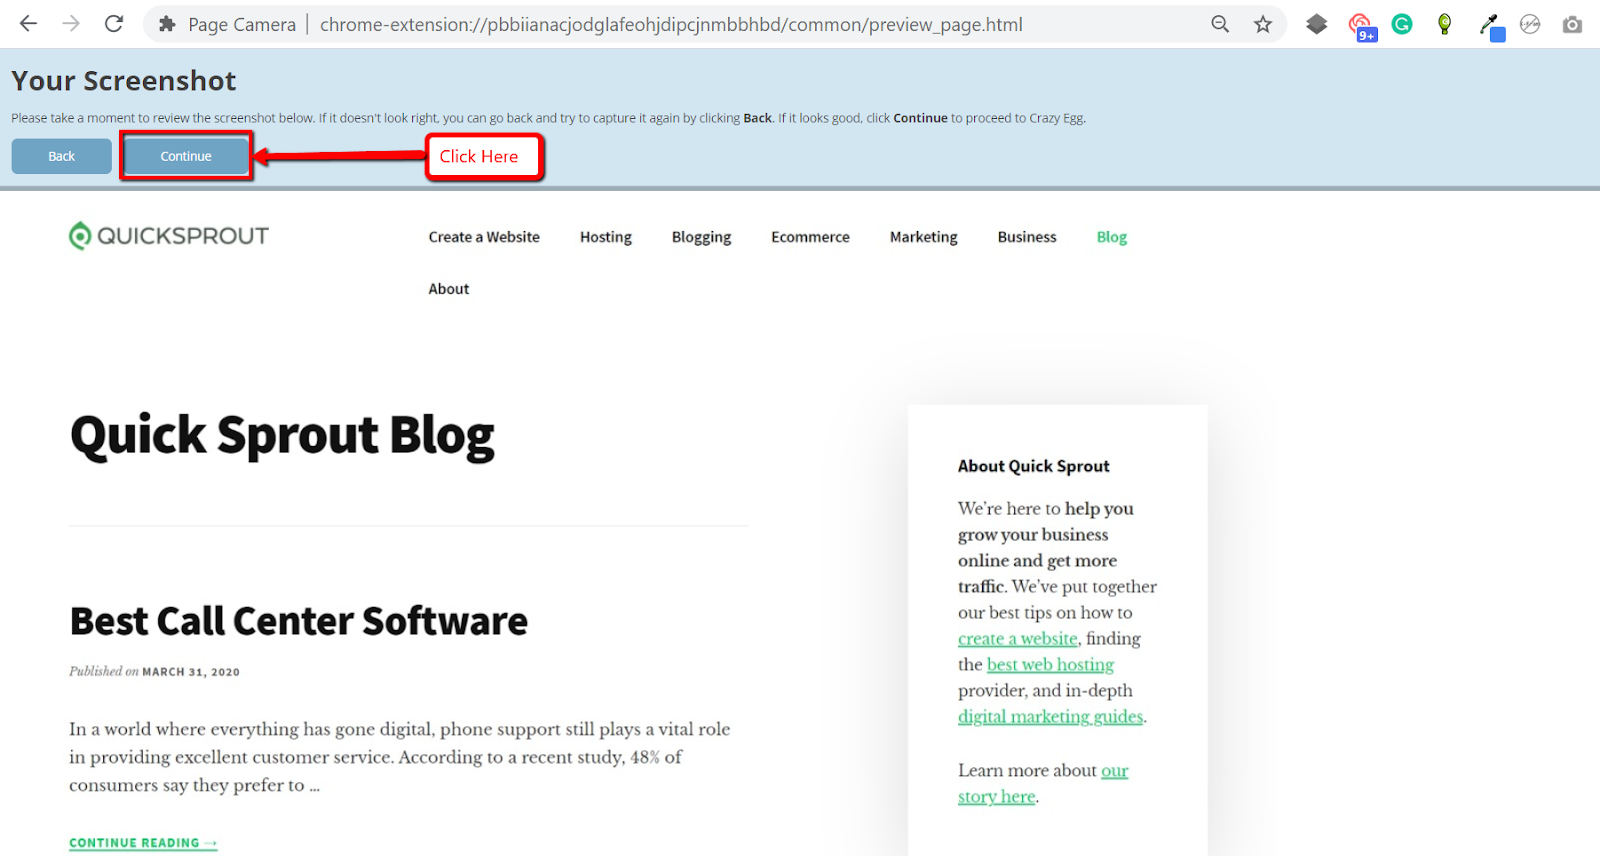
Once reviewed, click Continue.
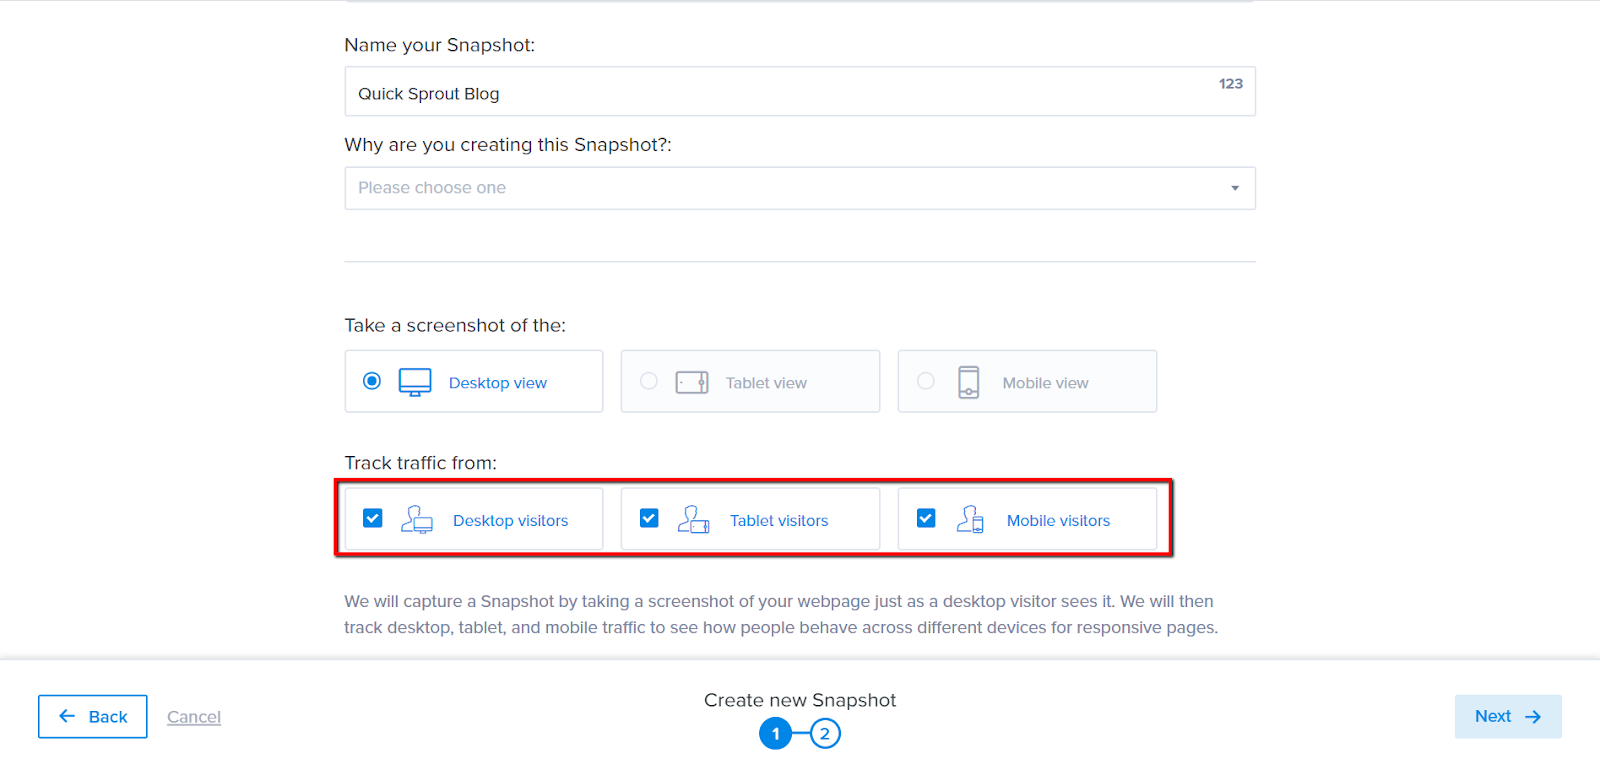
If your mobile visitor volume is less than 25% of your overall visitor traffic to this page, you will want to track traffic from all three device types. Otherwise, choose desktop visitors only.
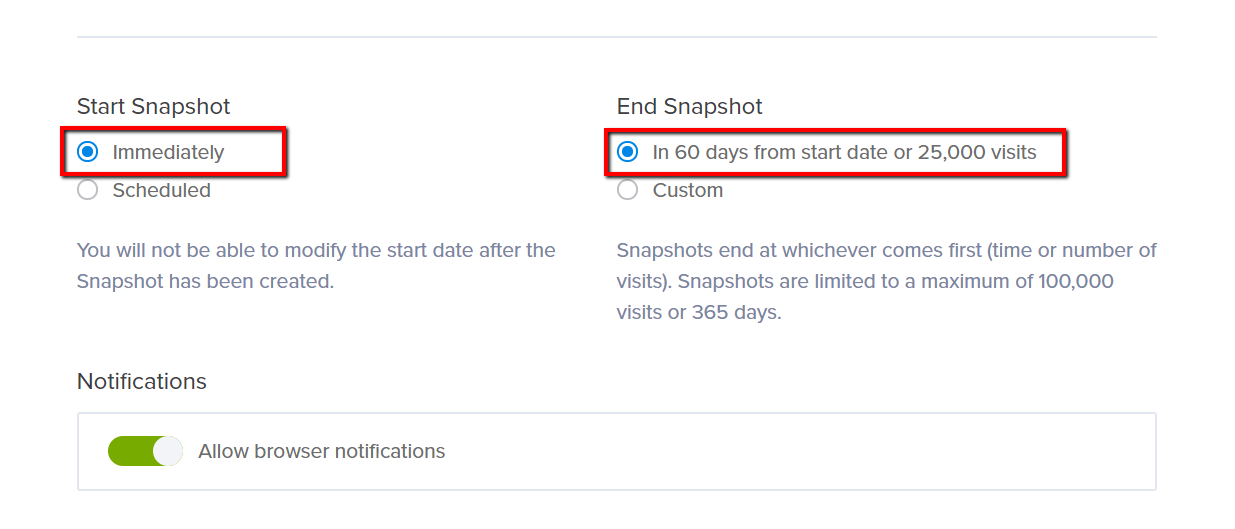
By default, the Start and End Duration settings are set for you. A Heatmap will start tracking immediately. A Heatmap will stop tracking after 60 days OR after 25,000 visits.
At this point, you can click on the Next button in the bottom right-hand corner.
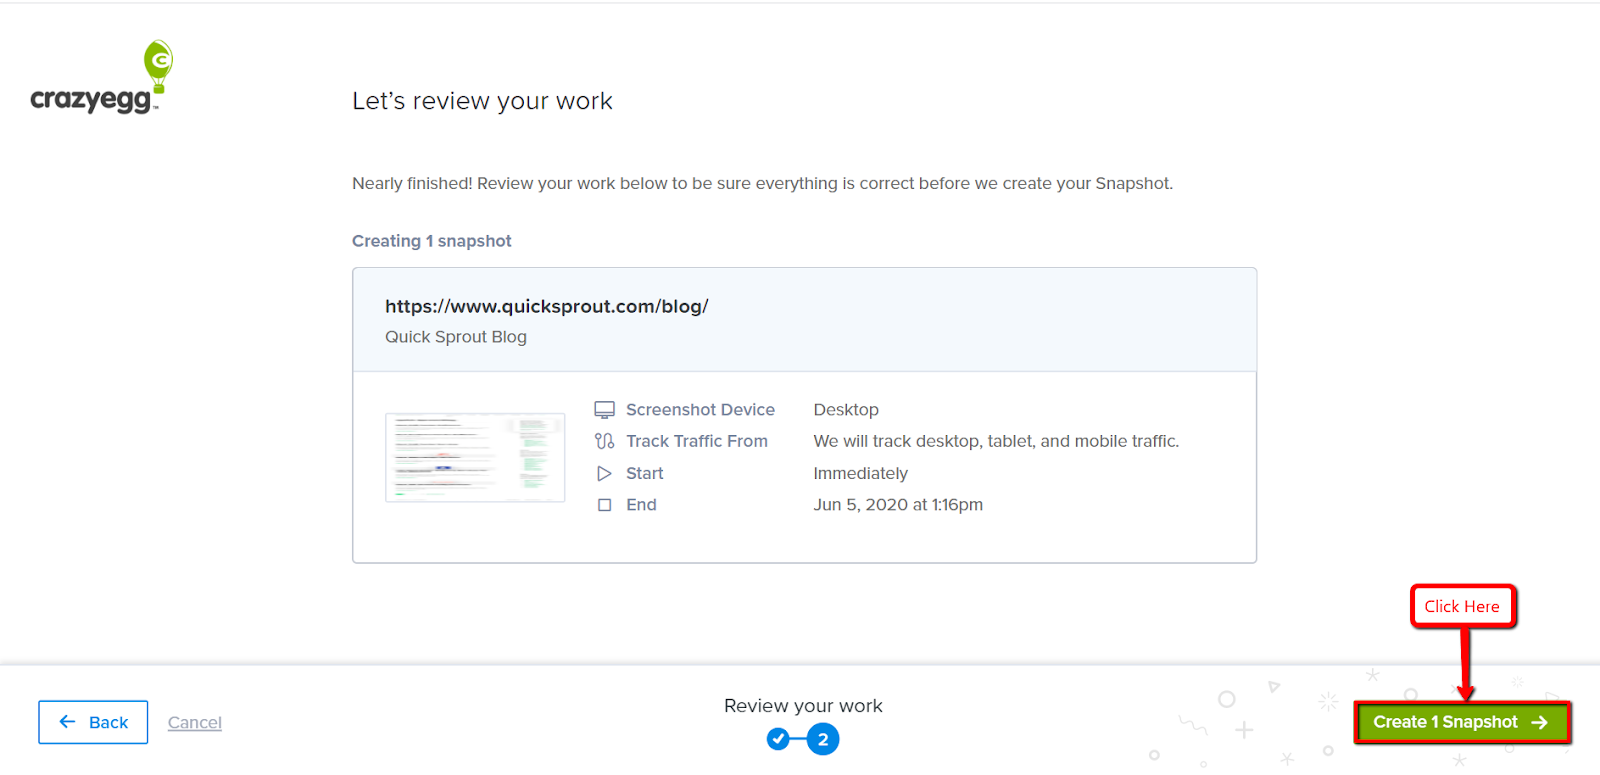
Click on Create # Heatmaps button in the bottom right-hand corner.
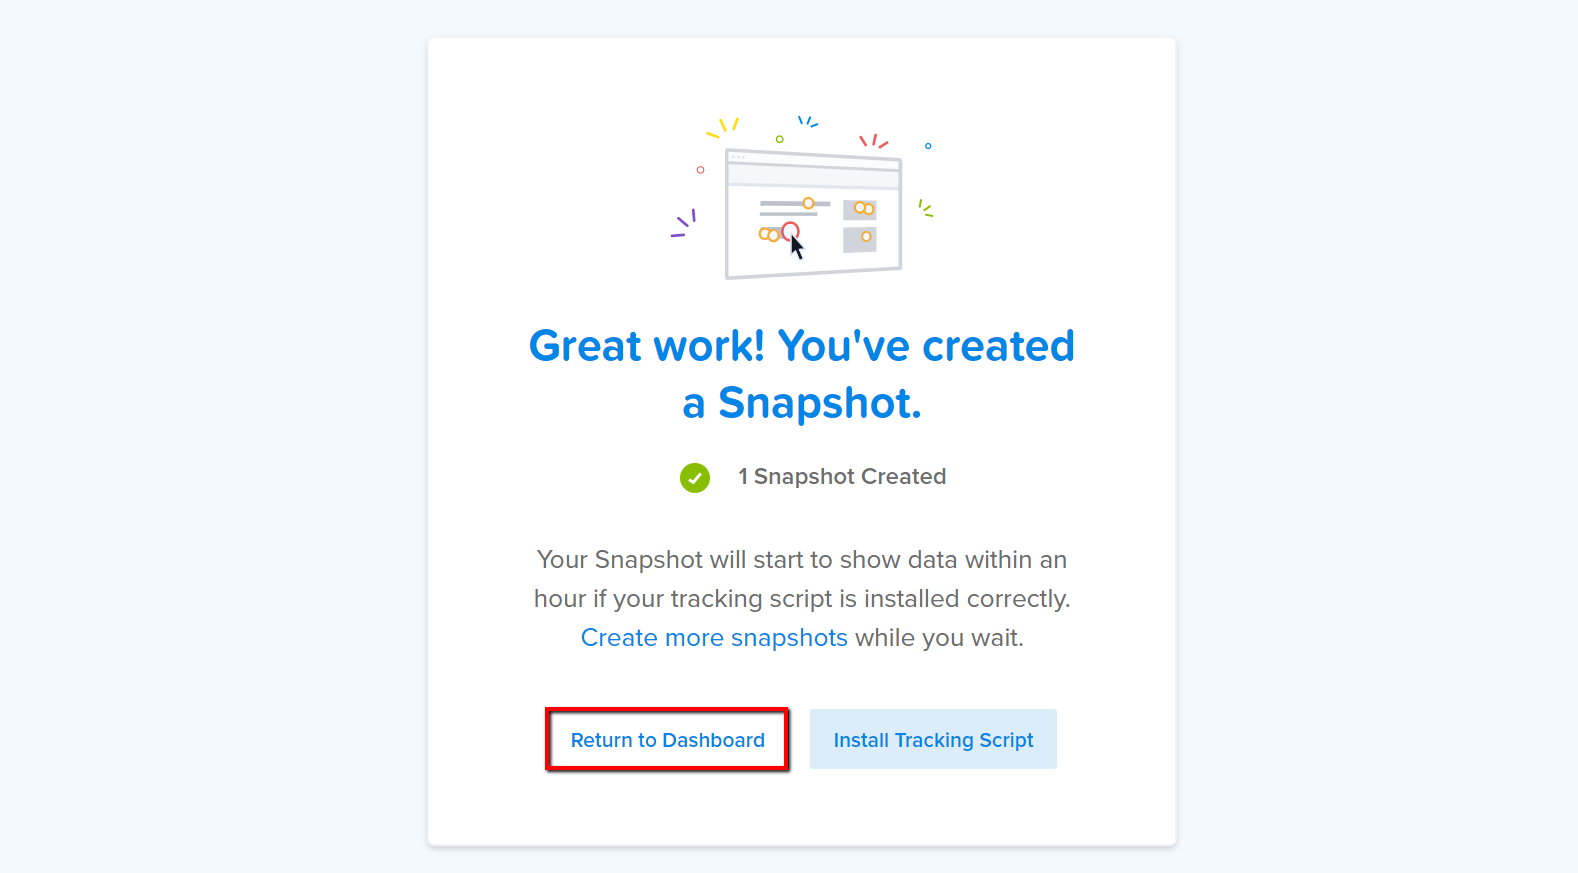
Congratulations! You have created your Heatmaps. Now click on Return to Dashboard.